Laundryheap Blog – Laundry & Dry Cleaning

Same-day collection. Free delivery in 24 hours.


Leave a comment

Everything you need to know about colour run stains

Image by Aqua Mechanical

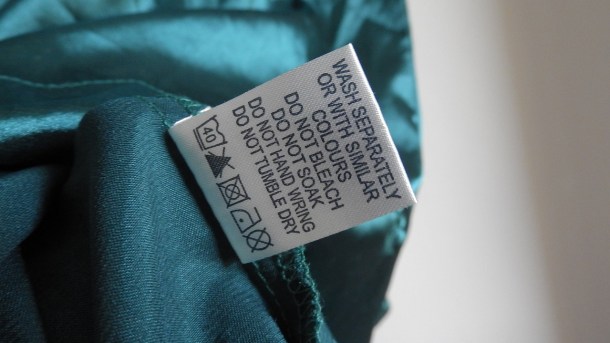
When the colours of your clothing bleed together, this is known as a colour run. Colour runs are very common, and this is everything you need to know about them. 

  • Why do colour run stains occur?
  • The colourfastness test
  • How to prevent colour runs 
  • How to get rid of colour run stains

Why do colour run stains occur? 

The brightly coloured clothing that we buy has been dyed using colour pigments. In order for our clothes to remain a vibrant colour, the colour pigments of the dye must be securely attached to the fabric. Colour run occurs when the coloured pigments have not been adequately attached to the fabric. When these inadequately attached pigments come into contact with water, the dye begins to run and can transfer onto other items of clothing. Colour run stains are most apparent when washing isn’t separated. If a darker item of clothing begins to run, it can be damaging to lighter colours of clothing.

Image by Mark Hillary

The colourfastness test

The most effective way to test if your clothing will run in the wash is by using the colourfastness test. This test should be carried out before you wash your item with any other clothing. 

Begin the test by selecting a hidden section of your item, such as the hem or seam. Dampen that section and lay something absorbent on the spot, such as a white paper towel or handkerchief. Next, iron on top of the absorbent material. If the colour from your item bleeds onto the absorbent material than your item is not colourfast and therefore could stain any other clothing it is washed with. 

Image by Marco Verch Professional Photographer and Speaker

How to prevent colour runs 

The best way to minimise the damage of colour run stains is by washing the same, or similar, coloured clothing together. This will mean that, should your colours run in the wash, there will not be a dramatic impact made to your other items in the wash in turns of colour difference. 

It is important to remember that hot water opens the fibres in clothing, therefore encouraging any non-colourfast clothing to run. The best way to combat this issue is to wash your clothing in cold water. 

Finally, to prevent colour runs, don’t leave your washing in a wet pile or in your washing machine, whilst wet, for a long period of time. This encourages any non-colourfast clothing to run and potentially stain multiple items of your clothing.

How to get rid of colour run stains 

If your colours have run and the stain is noticeable the best thing to do is treat the stain as soon as possible. Put your stained item back into the washing machine, on its own, and wash it again using laundry detergent. As long as you act fast, ideally when the item is still wet, the stain should remove itself. If washing your stained item using normal laundry detergent does not treat the stain, you can find specific stain remover laundry detergents. 

If your colour run was particularly bad, don’t forget to put your washing machine on an empty spin to clean out your machine and avoid any damage to the clothes you put in later. 

The best way to avoid colour run stains is by letting us launder your clothes for you. Book your Laundryheap service by visiting the Laundryheap website or by downloading the free Laundryheap app. We are now servicing Boston, including Boston City, Cambridge, Somerville and Brookline. 


Leave a comment

How to remove ink stains

Ink stains are a potential outfit ruiner. Whether you’ve accidentally ran a ball-point pen over the sleeve of your best white shirt, or your children have decided to give your favourite skirt a new design, ink stains can be incredibly difficult to remove. Try these methods for removing them.

  • Cover in Salt
  • Apply liquid laundry detergent 
  • Blot with rubbing alcohol 
  • Spray with hairspray 
  • Soak in milk
  • Spread over with vinegar and corn starch

Cover in salt 

If you catch your ink stain before it has dried you are incredibly lucky because they are easier to remove than dried stains. To remove fresh ink stains, cover the stain in salt and dab gently with a wet paper towel. Brush off the salt and check to see if the stain has been removed. If the stain hasn’t been removed, repeat the process, or try an additional method explained in this post.

Apply liquid laundry detergent 

For a dried, water-based, ink stain a liquid laundry detergent is best to use. Begin by laying your stained item of clothing on a clean towel. Apply water to the stain and blot with a clean cloth. As you blot you should begin to see the ink transferring from your stained clothing onto the cloth. Once no more ink is being transferred onto the cloth, apply a small amount of liquid laundry detergent on what’s left of the ink stain. Leave it to soak in for three to five minutes. After three to five minutes, wash your clothing on the hottest setting advised on the care label. Before drying, check that the stain has been completely removed and, if not, complete the process again. 

Blot with rubbing alcohol 

Before beginning with this method you need to check that your clothing won’t be stained further by the rubbing alcohol. To do this, dab some rubbing alcohol onto the seam of your garment and wait to observe if a reaction occurs. If nothing happens, you are safe to begin.

Firstly, lay your stained item of clothing on top of a clean towel. Using a clean cloth blot your ink stain with rubbing alcohol, this will begin diluting the stain. Be aware that the towel underneath your garment may become wet with rubbing alcohol and stained with transferred ink. If this happens, replace the wet and stained towel with a fresh one to ensure that no ink is re-transferred on to your clothing. Continue dabbing your stain with rubbing alcohol until no ink is transferred onto the cloth. Once you’ve reached this point, wash off any rubbing alcohol residue. 

If you are treating a ball-point pen stain, rub a small amount of liquid laundry detergent on to the stain and leave it for three to five minutes. Wash off the detergent and observe whether the stain has been removed. 

Before moving forwards, observe whether the blotting and liquid detergent has been successful in removing the ink stain. If so, wash your garment on the hottest wash suggested on your clothing items care label. If the stain has not been successfully removed, mix a solution of oxygen-based bleach and cool water. Completely submerge your clothing in the solution and leave it to soak for 8 hours. If your stain has still not been removed, make a new solution, and leave your clothing for another 8 hours. This should remove the stain, and leave your clothing ink free.

Spray with hairspray 

Most hairsprays contain alcohol which is incredibly useful when dissolving ink and removing ink stains. The higher the alcohol content in the hairspray, the more effective it will be in removing the stain- often the cheaper hairsprays have the highest alcohol content.

Lay your stained garment on a clean towel, and thoroughly spray the stain. Blot the stain with a clean cloth until the stain has been removed. Once removed, wash your clothing according to the advice on your garments care label. If the stain has not been removed, repeat the process.

Image by Andrew Magill

Soak in milk

If you have time for a more time-consuming ink stain removal method this could be the solution for you. Fill a bowl with enough milk to completely submerge your ink stain. Place your stained clothing in the milk and leave it overnight to soak. Remove your clothing in the morning and observe whether the stain has been removed. If your stain has been removed, wash your garment as normal. If your stain has not been removed, repeat the process, or perhaps try one of the other methods suggested in this post.

Spread over with vinegar and cornstarch 

Begin this process by laying your damaged item on a clean towel and soaking your stain with vinegar. Whilst the vinegar begins breaking down the ink, mix two parts vinegar with three parts cornstarch until a paste has formed. Once you have reached paste consistency, spread it over the ink stain and leave it to completely dry. Once your paste has dried, wash your item as you normally would. 

If these methods aren’t successful in removing your ink stain, leave it to us to remove. Book your slot by visiting the Laundryheap website or by downloading the Laundryheap app.  


Leave a comment

How to get rid of ironing stains

Marco Verch Professional Photographer and Speaker

Ironing stains are easily done and yet increasingly difficult to get rid of. Some ironing stains are unsalvagable and can only be aesthetically lighter rather than removed. These six methods will either help to lighten, or completely remove, ironing stains. 

  • Method 1- Bleach the stain 
  • Method 2- Soak in hydrogen peroxide
  • Method 3- Squeeze lemon juice over the stain 
  • Method 4- Soak in ice water 
  • Method 5- Rub with white vinegar 
  • Method 6- Use an emery pad

Method 1- Bleach the stain 

Before starting this method make sure that you check the stained items care label. Some clothing will come with a warning to not use bleach, in which case this method should not be used. 

Once you have checked the care label, soak your item in diluted bleach. After 15 minutes, remove the item and wash it as you usually would. To get the most effective result, dry in direct sunlight. The sun’s natural lightening abilities will help lighten the stain so at the very least the mark will be less visible.

Method 2- Soak in hydrogen peroxide 

Begin by laying the garment on a flat surface. Soak an old cloth or piece of fabric in hydrogen peroxide and place it on the iron stain. Next, put a clean, dry, cloth or piece of fabric on top of the hydrogen peroxide soaked material whilst you let your iron heat to a high temperature. Once your iron is hot, gently rub it over the top piece of fabric. The heat will gently permeate through to the hydrogen peroxide and help work it into the stain. As you iron make sure that you check the progress of the stain. If you notice that your bottom cloth is getting dry, apply more hydrogen peroxide to it. Likewise, if your top cloth is becoming damp with hydrogen peroxide switch it for a new, dry, cloth as this will prevent rust stains transferring from the iron. This process can take a while, so patience is key.

Method 3- squeeze lemon juice over the stain 

Squeeze the juice of one lemon over the stain until it’s completely soaked. Place your item of clothing in a container of hot water and let it sit for 15-30 minutes depending on how severe the stain is. Remove the clothing item and dry as normal. 

Method 4- Soak in ice water 

If your stain is mild soaking it in ice water for an hour could remove it. For this method, you need to ensure that your water is ice cold. To guarantee this either add ice cubes to cold water or leave your item in some water in the freezer. If you do leave your clothes in the freezer, make sure you only leave them in there for a maximum of 1 hour. Completely freezing your clothes won’t cause any additional damage, but can slow down the stain removing process. 

Image by Bruno /Germany from Pixabay

Method 5- Rub with white vinegar

If you decide on this method it’s important that you use white vinegar only- using any other type of vinegar could stain your clothing further. Soak a rag or sponge in white vinegar and rub it over the stain. Once the stain is completely soaked, leave the item to sit for 10-15 minutes before rinsing with cool water. Leave your clothing to dry as normal. 

Image by Willis Lam

Method 6- Use an emery pad  

A heavy scorch mark can not be removed, however the damage can be made less visible. Using an emery pad, or any rough material, gently rub the burn mark, removing any dark singed material. Be gentle with your rubbing movements, being too aggressive can cause further holes and damage to the material. 

Image by Marco Verch Professional Photographer and Speaker

If your clothing has been stained beyond repair and you are considering throwing out the item, try and reuse it for an alternative purpose. Consider making a tote bag or pillow case- anything to limit the clothing pollution that comes with throwing away clothing. 

The best way to treat any stain is by getting it treated at a dry cleaners. Book your slot on the Laundryheap website or by downloading the Laundryheap app. 


17 Comments

Dry Cleaning: Benefits Of Professional Care

A lot of people still see professional dry cleaning as a luxury, but we at Laundryheap understand that it is, in fact, a necessity. Dry cleaning has countless benefits that you can’t get from doing your laundry at home.

Not every piece of clothing needs to be dry cleaned. However, taking care of the items that do will prolong their life and maintain their beauty. Make sure you pay attention to care labels on your clothes to know which pieces are best dry cleaned. Alternatively, you can talk to the specialists if you are having trouble with the details.

  • Professionals pay close attention to detail 
  • Dry cleaning is less abrasive 
  • Perfect for removing stains and odours
  • Prolongs your clothes’ lifespan 
  • Saves you time and stress
  • Dry cleaners can handle large items 
  • Laundryheap is always here to help

Professionals pay close attention to detail

Doing the laundry at home means you have to cover all the steps, including washing, ironing, folding and storing items. As a result of all these different tasks, people can often overlook important aspects of cleaning clothes, which will have a massive impact on your clothes life span. 

When taking your clothes to professional dry cleaners, they can handle all these tasks for you with extra care. Professionals like us here at Laundryheap understand the different needs of different types of clothing. All you need to worry about is collecting it at your door and hanging the clothes in your wardrobe. 

Dry cleaning is less abrasive

Modern dry cleaning innovations are using greener products that are less abrasive on your clothing than traditional laundry techniques we use at home. The professionals know which clothes require a wet cleaning process and which do not. 

Likewise, professional dry cleaners know how to deal with delicate items that require special care. Dry cleaners are up to date with the best practices and will clean your clothes in the smartest possible way.  

laundry

Perfect for removing stains and odours 

There are lots of excellent home remedies for removing stains, but most come with a risk of ruining the clothes further. It is always a safer idea to get the professionals to deal with your tricky stains and lingering odours. 

So, if you ever find yourself about to throw your clothes away because you can’t get rid of this latest stain, why not take it to the dry cleaners? You’d be surprised at some of the hidden magic the professionals have up their sleeves. 

Prolongs your clothes’ lifespan

Everyone wants their clothes to look fresh for longer. One of the best ways people can achieve this is by having your garments professionally cleaned. 

By getting the dry cleaners to take care of your items, they are less exposed to fibre-wearing agitation that comes from the washing machine. As a result, they will last longer and retain their original colour. Also, a big bonus is you will end up saving money because you won’t need to purchase new clothes as frequently. 

sort laundry

Dry cleaners have the capacity for larger loads at once

It could seem evident to some, but not all, that dry cleaners have more capacity than your average washroom. If you are looking to get items like curtains, rugs, sofa covers or bedding cleaned well, then look no further than the dry cleaners. 

What can seem like a torturing chore for you to handle at home is a walk in the park for the professionals. Using a professional service for big items will save valuable time and reduce stress. 

Saves you time and stress

Dry cleaners don’t just take a load of laundry, but they also take a load of stress off your back. By handing over that task to the professionals, you can now enjoy your free time by doing the things you want to do. 

Time is valuable and often overshadowed by work or chores that can take up your entire day. So, by using a dry cleaners, you are regaining that precious time to spend with friends, family or yourself. 

Laundryheap is always here to help

Often people’s biggest issue when it comes to seeking professional help comes from having to leave the house. That’s why Laundryheap comes to you. We come to your home or place of work, pick up your dirty clothes and return them within 24 hours fresh, ironed and ready. Did we mention that we also do all this with no collection or delivery charge? 

So, next time you want to enjoy your free time and give your clothes a professional clean, look no further than Laundryheap


Leave a comment

Cleaning Your Children’s Dirty Sports Kits

Cleaning your little one’s sports uniform is a problem faced by mothers the world over. Whether you are a soccer mom, rugby mum or athletics mother, at one point or another you will find yourself faced with grass stains that seem impossible to tackle. 

Fear not though, this guide will help you regain the joy you first felt watching your children play sport and no longer shudder every time they come home with a dirty kit. 

  1. Act straight away
  2. Know your fabric
  3. Pre-soak
  4. Pre-wash 
  5. Avoid Chlorine Bleach
  6. Removing Grass
  7. Cleaning mud
  8. Cleaning Sweat
  9. Drying
  10. Consult The Professionals 

Act Straight Away

You could be forgiven for wanting to bury your head in the sand when your child first comes home with a fresh bag of wet, muddy and smelly clothes . Especially if it isn’t laundry day. It is important to keep in mind that by doing this you will be making the whole process much harder for yourself in the long run. If you take one thing away from this guide today let it be this. Tackle that kit as soon as it comes through the door.

Know Your Fabric

Standard football kits are made predominantly from a polyester-nylon mesh. School rugby kits are often made from polyester with a lycra blend. Both sets of materials are made for their durability and thankfully are both easier to clean than cotton.

Pre Soak

Once you’ve established the fabric you want to get that kit soaking as quickly as possible. Try to run the tap and get as much mud off as possible. Some parents have even been known to hang the kit on the washing line and rinse with a hose. 

Once you have got as much mud off as possible, fill a bucket with warm water, mix with one cap of laundry detergent and a cup of baking soda. We would advise leaving the kit to sit for at least an hour or more.

Pre Wash

Check to see if your washing machine has a pre-wash option. If so, take advantage of it! Using your pre-wash setting allows the main wash to be as clean as possible. 

We advise using half a cup of standard washing powder and a half a cup of oxidizing stain remover in the pre-wash. Do the same when it comes to the main wash but use a full cup of stain remover this time.

laundry machine

Avoid Chlorine Bleach

Despite how tempting it may seem to use chlorine bleach, don’t! Polyester and chlorine do not see eye to eye. If you feel you have to use bleach try to find an all-fabric bleach. You don’t want to be forking out more money for a new kit because you ruined the last one. 

Removing Grass Stains

The absolute best way to get rid of grass is to use non-chlorine bleach. But as mentioned above make sure this bleach is not chlorine bleach as it won’t end well for anyone involved. Make sure you soak the kit in this for a solid hour before using the heavy-duty detergent to finish the job.

Removing Mud

Mud can be a tricky one. This is because the key to removing it is by letting it completely dry. If your children used their kit at the start of the school day then this shouldn’t be a problem for you. 

If this is not the case and the mud is still wet, do not attempt to wipe it away as it will only rub deeper into the fabric. A good hack is using a toothbrush or plastic cutlery to gently scrape the mud from the kit.

Cleaning Sweat

We seem to never stop mentioning the benefits of baking soda and white vinegar on this blog. Cleaning sweat stains or smells is where this unlikely couple truly show they are a match made in heaven. Simply rub some on the affected area before placing your kit in the wash. The outcome will be a fresh smelling sports kit.

Drying

Always air dry sports kits to make sure no shrinkage occurs. If you have to use a tumble dryer we advise setting it to low heat. 

Consult The Professionals

When in doubt, go to the professionals. Laundryheap will give you a fast and professional service on any dirty sports kits you can’t bare to wash again. We pick up and deliver in 24 hours and charge no delivery fees. 


Leave a comment

Complete Guide To Removing Different Sauce Stains

Is there anything worse than dry food? Sauce, in all its incredible different varieties, has meant we never have to worry about our food being too dry again. These moist and flavoursome little bottles of joy do come with there own problems though.

It doesn’t matter if it is the bright red ketchup, golden yellow mustard, or the infamous brown BBQ sauce that your taste-buds desire most. All of these wonderfully tasty condiments can leave us in a state of panic every time we carelessly spill them onto our new white t-shirt. We are here to try and ease that panic. Next time you find yourself overindulging in a hot dog that is drowning in mustard and ketchup, make sure you know how to remove the stains once the inevitable happens. 

  • Tomato Sauce
  • Mustard
  • BBQ Sauce 
  • Mayonnaise
  • Chilli Sauce 

Tomato Sauce 

 You can find this versatile vegetable (or fruit!?) in cuisine all over the world. Whether its ketchup on your fries, spaghetti sauce or bloody mary’s, sauces that mostly contain tomatoes can make it seem like the end of the world when spilt on our clothes.

The best thing you can do when spilling tomato sauces on your clothes is act as soon as possible. Try to use heavy-duty laundry detergent and make sure you use the hottest water recommended for the fabric on the garment care label. Always ensure you check the laundry symbols before washing the garment. To start with, gently rub the liquid detergent directly on the stain. Next, place the garment into the machine to be washed. Make sure to air dry after, as heat from the dryer can set in any remaining stain particles that have not come off in the wash. 

Mustard

Like ketchup, mustard can cause most people to shriek when it’s spilt on your clothing due to its luminescent colour. Mustard contains a dye called Tumeric to enhance the yellow colour, which means it must be treated differently to other stains on this list. 

If a mustard stain does not get treated quickly, the turmeric dye can remain on your clothing as a permanent reminder of your carelessness. Try to catch the stain while it is still moist and blot immediately. Make sure you do not rub the stain, as you do not want to spread the turmeric onto unstained parts of the garment. 

Finally, mix a solution of three-quarters of dish soap and one quarter rubbing alcohol. Apply the mixture to the stain and allow to soak for 10 minutes, just long enough for it not to dry. The alcohol in the solution should turn the stain a dark colour, but not to worry, it will rinse right out! Rinse the treated area with hot water, and then launder like normal.

BBQ Sauce 

Would a barbecue even be a barbecue if it wasn’t messy to eat? Most people attending a barbecue know the risks going in, but that still doesn’t make the BBQ sauce stains any less harrowing. 

Removing the stain is a two-step process. Soak the affected garment just like you would soak a dirty dish in warm water with dishwashing detergent, this will help loosen the sauce from the fabric and help clean the stain. Once you have left to soak for at least ten minutes, pour some vinegar on the affected area and scrub with a kitchen sponge. After you’ve treated the stain, run the garment through the washing machine like normal. 

Mayonnaise

Mayonnaise is probably the least threatening colour of all sauces listed in this guide, but do not let its neutral colour fool you. Mayonnaise can leave oily spots on your clothing that are not always easy to remove.

When you spill a blob of mayonnaise on your clothing, use a blunt object like a butter knife or spoon to lift as much of the Mayonnaise off the fabric as you can. Never rub because this will push the stain deeper into the fabric, making it harder to remove. Seeing as the bulk of the issue is an oil-based stain, every Mayonnaise stain should be pre-treated using solvent-based stain removal products. If you don’t have any solvent-based stain remover at hand, apply a bit of heavy-duty liquid detergent instead. Then work it in by delicately rubbing with your fingers or a soft-bristled brush. Lastly, wash the garment in the washing machine on the highest heat it recommends on the label

Chilli Sauce

Need some spice in your life, but don’t like it trickling onto your clothes? A good old fashioned spicy hot sauce is great for adding flavour to your dishes, but not so great for your new white work shirt. Most hot sauce ingredients consist of peppers, spices and vinegar. Assuming your favourite brand of chilli sauce doesn’t add too much artificial food colouring, the stains should be simple to remove. 

Acting immediately is proving to be a common theme in this guide. You guessed it, don’t wait until you’ve finished your food to act on a chilli sauce stain, get on the job straight away! 

First things first, run the stain under the tap for at least a minute. Do not rub the stain here, instead let the water flow do the work. We also recommend turning the item inside out and cleaning from the backside to remove it from within the fabric. After this, place the clothing in a sink filled with cold water, add a tablespoon of liquid detergent and vinegar, then gently scrub the stained area. Lastly, put the item in a washing machine and make sure to use warm water, never hot, as this will set the stain. 

If you don’t have the time or patience to clean a worrying stain out of your clothing, why not let the professionals help you? Laundryheap is here to help by offering same-day laundry & dry cleaning collection with free next day delivery.


Leave a comment

How To Remove Slime From Your Clothing

Slime is fun to make and play with until it accidentally gets stuck onto your or your kids’ clothes and you’re left with a slime stain that seems impossible to take out. Fortunately, removing a slime stain is easier than you think. 

How To Remove Slime From Your Clothing

There are 2 ways in which you can effectively remove slime from your clothing:

  • Ice 
  • Vinegar

Before using either of the slime removal methods, make sure to remove and scrape off as much slime as possible.

Ice

Take some ice cubes and place it on the remaining slime to completely freeze. Once it is completely frozen, scrape off the slime as much as possible without using much force before pre-treating it with laundry detergent. After letting the detergent sit for 10 minutes, soak the clothing in hot water for about 30 mins before washing as normal.

Vinegar

Pour distilled white vinegar on the stain and scrub the vinegar into the slime using a toothbrush. If the stain is tough, allow the stain to soak in vinegar for up to 5 mins before scrubbing. Once you’ve gotten rid of the slime, rinse the garment in warm water, with dish soap if you wish, to remove any residue, before washing as normal.


Should you wish to get your clothes professionally cleaned at a time that is convenient for you, book a laundry collection and delivery with Laundryheap.


Leave a comment

No Pain- No Stain! Unusual Stain Removers Part 2

If you haven’t done so already, check out the first No Pain- No Stain! Unusual stain removers.

Unusual Stain Removers- Part 2

  1. Rubbing Alcohol- Removes ink and deodorant stains
    This antiseptic wonder can remove several types of stains provided that they are fresh. Remove ink and deodorant stains with rubbing alcohol simply by applying it directly onto the stain and dab (the ink) or wipe (deodorant mark) away before washing as normal.

  2. Coca Cola – Removes blood and oil stains
    Blood and grease stains are both tough ones to get rid off, so you’ve got to treat them as soon as you can. Believe it or not, cola will help take that stain right out. Soak garment in cola for a good 15-30 mins or so depending on how bad the stain is, before washing as normal.  Don’t worry about a cola stain, as it will come right off once you put it straight into the wash after pre-soaking.

  3.  Shampoo- Cleans collared shirts & great for hand washing
    A dirty collar is something that a little shampoo can fix. Shampoo works to break down body oils in your hair and will do the same for fabrics too. Just rub a bit of cheap shampoo on the collar and watch it remove the dirt. You can also use shampoo as an alternative soap to hand washing clothes.

  4. Shaving Cream- Removes food and grease stains
    To get rid of stubborn food and grease stains, add a bit of shaving cream on the stain and continuously dab it lightly for a few minutes and let it sit for about 30 mins. Then, blot the shaving cream away and wash as usual.

You can save yourself the trouble by scheduling a collection with laundryheap for even the most toughest stains you have on your clothes and we’ll have it returned to you as good as new in less than 24 hours.


2 Comments

3 Ways To Remove Underarm Stains

Underarm stains on your clothes from sweat and deodorant can be difficult to get rid of, especially when the stain has now turned yellow. The reason why this happens is simple, you either didn’t treat the stain right away or at all. Fortunately, there are some effective methods you can use to remove these stains from any type of clothing.

3 Ways To Remove Underarm Stains

  1. White Vinegar: Pour some white distilled vinegar directly onto the stain and gently rub it in. Leave for a few mins before washing as normal.
  2. Baking Soda: Create a paste of 3 parts baking soda and 1 part water (3:1) and use a toothbrush to apply the paste and scrub gently onto the stained area. Leave for a few minutes or up to 2 hours if the stain is really bad, and then wash as normal
  3. Lemon juice: Mix equal parts of lemon juice and water and scrub the stain with the solution. You can also choose to soak the stained area in the mixture for 10 mins up to an hour depending on how bad the stain is.

If you prefer to have a professional take the stain out and have your clothes freshly cleaned, you can count on Laundryheap to do the job. 


Leave a comment

How To Remove Chewing Gum From Clothes

Chewing gum is the most annoying thing to get rid of when it gets stuck on…well… everything! It’s more irritating, however, when you get chewing gum stuck on your clothes as it’s more difficult to remove.

Nevertheless, there are several ways to remove chewing gum from your clothes.

How To Remove Chewing Gum From Your Clothes

  • Ice

Apply ice on the chewing gum affected area until it has fully hardened. Then use a spoon or blunt knife to immediately scrape it off. You can apply ice on both sides of the material for quicker removal.

Alternatively, you can put your garment into a zip lock bag, folded, with the gum stain facing outside and place it in the freezer overnight. You should be able to gently peel off the gum the following morning.

  • Heat

All you need to do is apply heat onto the gum, whether it be by hot air or by submerging in hot water. There are several ways you can use heat to remove gum:

Method 1: Blow Dryer

You can use a blow dryer, on the highest temperature setting, to melt away the chewing gum. Which you can then peel off from the surface.

Method 2: A Kettle

Boil some water in a kettle, and place the gum affected area over the mouth of the kettle, so it catches the steam. Leave it for a minute or so until the gum softens. Then, remove the gum with a toothbrush.

Method 3: Hot Water

Submerge gum affected area into a pot of hot water and scrape off the gum with a toothbrush or blunt knife. Let garment dry and repeat if necessary. 

Method 4: An Iron

Place the garment on a piece of cardboard, with the gum facing on the cardboard. Using an iron on medium setting, iron the back of the chewing gum so it transfers onto the cardboard. Repeat process until the gum is nearly removed.

  • Rubbing Alcohol

This method is a much simpler one. All you need to do is pour a small amount of rubbing alcohol on a rag or sponge and rub the gum with it.

  • Hairspray

Spray some hairspray on the gum so it hardens, and then scrape off the chewing gum with a blunt knife or spoon.

  • Vinegar

Heat up a cup of vinegar in the microwave, to just below a boil. Use a toothbrush and dip it into the vinegar and start brushing off the gum. Keep dipping and brushing until the gum comes off. This method works best when the vinegar is hot.


If you still struggle with removing the gum or simply don’t want the hassle of trying to, send it to laundryheap and we’ll be able to take that gum stain right off.