Laundryheap Blog – Laundry & Dry Cleaning

Same-day collection. Free delivery in 24 hours.


4 Comments

How To Clean My Shoes? Top Tips For Fresh Looking Shoes

Unfortunately, there is just no way around getting your shoes dirty. No matter how much you try to keep them clean, walking around puddles or checking the weather forecast before leaving the house. Somehow, someway, they won’t stay clean.

While cleaning your footwear seems like a simple enough task, there are a few factors to consider. For instance, what type of material are your shoes made of, what cleaning product to use, and how you should apply the product. To help you figure this all out, we’ve put together this helpful guide. So, follow these handy tips to have your shoes looking box fresh once again.

  • Know Your Material Before You Start 
  • What You Will Need
  • Leather
  • Suede
  • Sheepskin Boots
  • Canvas Shoes
  • Running Shoes
  • White Sneakers
  • Don’t Forget The Laces

Know Your Material Before Your Start 

When thinking about how to clean your footwear, the crucial factor to keep in mind is what material they are made from. Cleaning leather is an entirely different operation than cleaning suede. Likewise, techniques for cleaning canvas footwear can vary from cleaning sheepskin boots. 

So, before you start cleaning your beloved new boots, make sure you know if they are leather or suede. Similarly, make sure you know the difference between your canvas’ and your running shoes. Having this knowledge will allow you the best possible chance of restoring your footwear to their former glory.

What You Will Need

Before you start the cleaning process, there are a few things you should have available before starting. A dry brush is useful for almost all types of shoes. If you don’t have access to an actual soft-bristled shoe brush, don’t fear. An old toothbrush should do the trick just fine. But, when cleaning suede, we would advise using a suede brush, as this material is more delicate than others. 

Also, access to some laundry detergent and vinegar will prove helpful depending on what type of material you are cleaning. 

Leather Shoes

Leather shoes are an essential part of most peoples work attire. Consequently, keeping them clean is necessary for people hoping to look smart at work. 

When cleaning leather, start by removing any debris by wiping a solution of equal parts water and vinegar over the affected area. Once the leather is dry, rub with a soft cloth. Likewise, when trying to remove scuffs, use a wet cloth dipped in baking soda. After this, wipe your shoes off, then buff them again once they’ve dried. 

Suede Shoes 

Cleaning suede often strikes fear into most peoples hearts. But, try not to panic, there is an art to cleaning suede, that can leave you with fantastic results. 

Start by finding a nailbrush or suede brush. Once you have one of these, work in one direction to gently buff away stains. Now you have removed the surface dirt from the suede, start adding pressure, going back and forth with the brush to work at the harder to remove stains. For the extremely stubborn stains, use a white washcloth to rub either white vinegar or rubbing alcohol onto the affected area. Don’t worry this won’t leave a watermark, but it will give your suede a new lease of life. 

Sheepskin Boots

Sheepskin is a material similar to suede, which means extra care is needed when dealing with it. Like with suede, use a nailbrush or scrub brush, to gently wipe off any dirt at the surface of the boots. After that, wipe the outside of the boot with a damp cloth. Make sure it is not too wet, as you could ruin the material. Next, using a mixture of equal part’s cold water and vinegar, gently rub the areas that need spot cleaning. Finally, finish by wiping the mixture off with a damp cloth and leave to dry.  

Canvas Shoes

People often use canvas shoes for playing sport or in their everyday activities. Because of this, they require cleaning more regularly than the other types of shoes already mentioned in this guide. 

Start cleaning by wiping dirt off the canvas shoes with a clean toothbrush. Next, make a paste of equal parts baking soda and water. Administer this paste onto the soles of the canvas trainers using the toothbrush to remove any unwanted dirt. Finally, run the gentle cycle on your washing machine with cold water, adding roughly half the amount of detergent you would usually use and toss in your shoes. Make sure you leave them out to dry, using the dryer could shrink your shoes and no one wants that! 

Running Shoes

Running shoes bring there own unique issues when it comes to cleaning. One of the major ones being the smell from the sweat produced when using them for sport. 

Start with removing loose dirt off with a toothbrush, then clean the brush after. Once the brush is clean, dip it into a teaspoon of laundry detergent mixed with a cup of water. Now use the brush on the fabric, mesh and rubber areas of the shoe. After this, use a wet sponge to wipe off the excess solution. Lastly, leave outside to dry in the fresh air to remove any unwanted odour picked up on your runs. 

White Trainers

White trainers are often the ones we want to preserve the most. Nothing compares to the look of a fresh white pair of trainers but keeping them that colour is often an uphill battle. 

To try and restore that pearly white colour your trainers was when you first purchased them, start with applying a small amount of nail polish remover to a cotton ball. Then use it to wipe away any stains you see on the white shoes. However, if the stains persist and you feel the need to resort to bleach, make sure you dilute it first, you don’t want to end up with discoloured shoes. Use a toothbrush to scrub the trainers with a solution of one part bleach to five parts water. Finish off by rinsing with warm water. 

Don’t Forget The Laces

Keeping your shoelaces clean is an imperative aspect of maintaining that fresh out of the box look. Often people will clean the exterior of their shoe but neglect their shoelaces, leaving them with an unflattering contrast of clean and dirty.

To start with, remove the laces from the shoes, this will make cleaning the laces easier for yourself. Next, use a toothbrush to loosen any dried dirt or grime, this should come off with relative ease. After this, you can start mixing a solution of 3 tablespoons of bleach to 1 gallon of water in a sink or basin. Once the solution is ready, place the laces in a small mesh laundry bag and soak in the cleaning solution for several minutes. Be sure to wear gloves as you don’t want the bleach to irritate the skin. Finally, place the laces in the washing machine, then launder with detergent and a 1/2 cup of bleach. You can then hang the laces outside to air dry for fresh, clean laces.

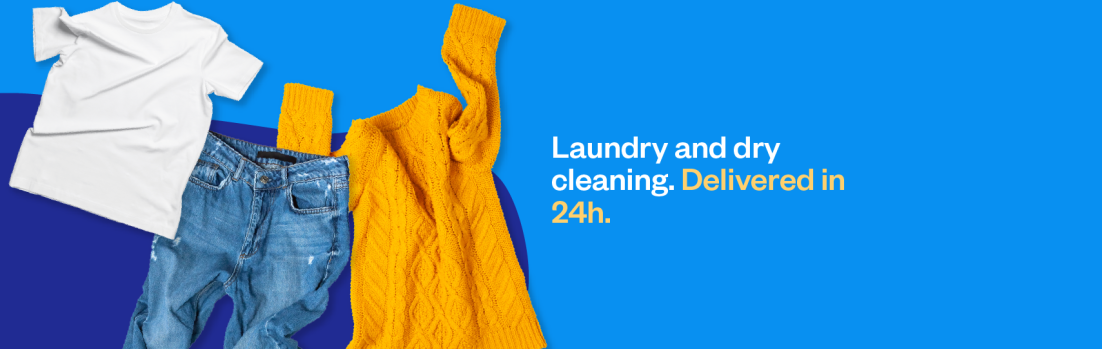
If you are having a bad case of laundrophobia and don’t want to clean your shoes, we are here to help. Laundryheap offers a same-day laundry & dry cleaning collection with free next-day delivery. 


Leave a comment

Cleaning Your Children’s Dirty Sports Kits

Cleaning your little one’s sports uniform is a problem faced by mothers the world over. Whether you are a soccer mom, rugby mum or athletics mother, at one point or another you will find yourself faced with grass stains that seem impossible to tackle. 

Fear not though, this guide will help you regain the joy you first felt watching your children play sport and no longer shudder every time they come home with a dirty kit. 

  1. Act straight away
  2. Know your fabric
  3. Pre-soak
  4. Pre-wash 
  5. Avoid Chlorine Bleach
  6. Removing Grass
  7. Cleaning mud
  8. Cleaning Sweat
  9. Drying
  10. Consult The Professionals 

Act Straight Away

You could be forgiven for wanting to bury your head in the sand when your child first comes home with a fresh bag of wet, muddy and smelly clothes . Especially if it isn’t laundry day. It is important to keep in mind that by doing this you will be making the whole process much harder for yourself in the long run. If you take one thing away from this guide today let it be this. Tackle that kit as soon as it comes through the door.

Know Your Fabric

Standard football kits are made predominantly from a polyester-nylon mesh. School rugby kits are often made from polyester with a lycra blend. Both sets of materials are made for their durability and thankfully are both easier to clean than cotton.

Pre Soak

Once you’ve established the fabric you want to get that kit soaking as quickly as possible. Try to run the tap and get as much mud off as possible. Some parents have even been known to hang the kit on the washing line and rinse with a hose. 

Once you have got as much mud off as possible, fill a bucket with warm water, mix with one cap of laundry detergent and a cup of baking soda. We would advise leaving the kit to sit for at least an hour or more.

Pre Wash

Check to see if your washing machine has a pre-wash option. If so, take advantage of it! Using your pre-wash setting allows the main wash to be as clean as possible. 

We advise using half a cup of standard washing powder and a half a cup of oxidizing stain remover in the pre-wash. Do the same when it comes to the main wash but use a full cup of stain remover this time.

laundry machine

Avoid Chlorine Bleach

Despite how tempting it may seem to use chlorine bleach, don’t! Polyester and chlorine do not see eye to eye. If you feel you have to use bleach try to find an all-fabric bleach. You don’t want to be forking out more money for a new kit because you ruined the last one. 

Removing Grass Stains

The absolute best way to get rid of grass is to use non-chlorine bleach. But as mentioned above make sure this bleach is not chlorine bleach as it won’t end well for anyone involved. Make sure you soak the kit in this for a solid hour before using the heavy-duty detergent to finish the job.

Removing Mud

Mud can be a tricky one. This is because the key to removing it is by letting it completely dry. If your children used their kit at the start of the school day then this shouldn’t be a problem for you. 

If this is not the case and the mud is still wet, do not attempt to wipe it away as it will only rub deeper into the fabric. A good hack is using a toothbrush or plastic cutlery to gently scrape the mud from the kit.

Cleaning Sweat

We seem to never stop mentioning the benefits of baking soda and white vinegar on this blog. Cleaning sweat stains or smells is where this unlikely couple truly show they are a match made in heaven. Simply rub some on the affected area before placing your kit in the wash. The outcome will be a fresh smelling sports kit.

Drying

Always air dry sports kits to make sure no shrinkage occurs. If you have to use a tumble dryer we advise setting it to low heat. 

Consult The Professionals

When in doubt, go to the professionals. Laundryheap will give you a fast and professional service on any dirty sports kits you can’t bare to wash again. We pick up and deliver in 24 hours and charge no delivery fees. 


1 Comment

How to be more environmentally conscious when doing laundry?

Laundry isn’t usually on the top of people’s list of ways to live a more environmentally conscious lifestyle. If you are someone who does multiple loads of laundry every week, it could be having a more substantial effect on the planet than you might think. The amount of water, energy, and products used when doing laundry can inevitably add up. 

Washing and drying your garments in a more environmentally conscious way can make for a more Eco-conscious household. These simple switches will not only reduce the environmental impact but will also save you money while you’re at it. 

  • Washing clothes in cooler temperatures
  • Always make sure you wash full loads
  • Get a green washing machine
  • Use green laundry detergent 
  • Wash by hand
  • Cut down on drying time
  • Hang clothes to dry
  • Don’t iron unnecessarily
  • Get the professionals to take care of it

Washing clothes in cooler temperatures

Up to 90 % of the energy used when doing your laundry involves just heating the water. Most of us know that having a long, hot shower is less environmentally friendly than a quick, short one. The same applies when doing your laundry. 

Washing clothes at 30°C instead of 40°C uses about 40% less energy. Doing your laundry at a lower temperature can also be better for your clothes. Exposing your clothes to hot temperatures can shorten the lifespan of the garment.

Always make sure you wash full loads.

Reducing the number of loads you do per week will save water and save you money. Even the most environmentally-efficient loads can use up to 40 gallons of water per load. 

Try reducing your loads as best you can throughout the week to reduce your carbon footprint. You could wear some clothes more than once before washing. This solution doesn’t go for all pieces of clothing, socks and underwear come to mind, but not tossing your jeans in the laundry basket after one wear is the first step to improving your laundry habit.

Invest in green machines

We are not suggesting that everyone throws out their current working washing machine and head to the shop to buy a new eco-friendly one today. If you are in the market for a new washer or dryer, buying a greener model can save energy and use less water, lowering your bills in the process. 

High-efficiency machines use between 20% to 60% less water and as little as 50% energy as traditional washing machines. Investing in a green washing machine will significantly reduce your environmental impact at home. 

washing machine

Use green laundry detergent 

Conventional washing detergents can be very damaging to the ecosystems where the dirty water we wash down the drain can end up. Standard laundry detergent contains phosphates which can have disastrous effects to marine life that comes in contact with it. 

When purchasing more Eco-friendly detergents, make sure you keep an eye out for labels that indicate the product is biodegradable and phosphate-free. These detergents are often more gentle on the skin, too. 

Wash by hand

We know this option will cause some people to wince.  Hand washing can be time-consuming, but there are some ways to make the process easier. Tools like a pedal washer can allow you to exercise while you wash your laundry, helping your body and the environment at the same time.

Hand washing can give you a sense of just how much laundry you’re going through weekly. As well as helping you see where you can cut back on the amount of laundry you do. 

Cut down on drying time.

Your dryer uses up a lot of energy – so anything you can do to cut down the time using this machine will help the environment. Not using your dryer as much can also save you money on your electric bill. 

Little things like cleaning the filter in your dryer can also save energy. If the filter is clogged, the clothes take longer to dry, meaning more energy wasted. 

Hang clothes to dry

One of the most optimal ways to cut down on time using your dryer is to hang your clothes to dry. If weather permits, hanging your clothes to dry on the line outside can take away 100% of the energy used when using your dryer. 

For people who live in a warmer climate drying clothes outside can be quick and easy. Those who live in wetter corners of the globe, can always line dry indoors all year round. Hanging clothes to dry will not only reduce energy, it will also cut your electric bill and make your clothes last longer.

Don’t iron unnecessarily

Ironing is top of most peoples most hated chores list. So why not cut it out when it isn’t necessary? Ironing consumes excess energy and can deteriorate the fabric on your clothing. 

We understand that even the most environmentally conscious of us still don’t want to rock up to a job interview with a creased shirt. To avoid looking scruffy, all you have to do is hang up your shirt straight after the wash cycle is complete. For materials that are more prone to creasing, like linen, just cut the final spin cycle on your wash, leaving more water in the fabric, resulting in fewer creases.

Get the professionals to take care of it

It might sound unconventional, but commercial washers and dryers tend to be more efficient than domestic machines because they are bigger and can take bigger loads. By using professionals like Laundryheap, you can lessen the number of loads, meaning less wasted energy and water at home. 


Leave a comment

Complete Guide To Removing Different Sauce Stains

Is there anything worse than dry food? Sauce, in all its incredible different varieties, has meant we never have to worry about our food being too dry again. These moist and flavoursome little bottles of joy do come with there own problems though.

It doesn’t matter if it is the bright red ketchup, golden yellow mustard, or the infamous brown BBQ sauce that your taste-buds desire most. All of these wonderfully tasty condiments can leave us in a state of panic every time we carelessly spill them onto our new white t-shirt. We are here to try and ease that panic. Next time you find yourself overindulging in a hot dog that is drowning in mustard and ketchup, make sure you know how to remove the stains once the inevitable happens. 

  • Tomato Sauce
  • Mustard
  • BBQ Sauce 
  • Mayonnaise
  • Chilli Sauce 

Tomato Sauce 

 You can find this versatile vegetable (or fruit!?) in cuisine all over the world. Whether its ketchup on your fries, spaghetti sauce or bloody mary’s, sauces that mostly contain tomatoes can make it seem like the end of the world when spilt on our clothes.

The best thing you can do when spilling tomato sauces on your clothes is act as soon as possible. Try to use heavy-duty laundry detergent and make sure you use the hottest water recommended for the fabric on the garment care label. Always ensure you check the laundry symbols before washing the garment. To start with, gently rub the liquid detergent directly on the stain. Next, place the garment into the machine to be washed. Make sure to air dry after, as heat from the dryer can set in any remaining stain particles that have not come off in the wash. 

Mustard

Like ketchup, mustard can cause most people to shriek when it’s spilt on your clothing due to its luminescent colour. Mustard contains a dye called Tumeric to enhance the yellow colour, which means it must be treated differently to other stains on this list. 

If a mustard stain does not get treated quickly, the turmeric dye can remain on your clothing as a permanent reminder of your carelessness. Try to catch the stain while it is still moist and blot immediately. Make sure you do not rub the stain, as you do not want to spread the turmeric onto unstained parts of the garment. 

Finally, mix a solution of three-quarters of dish soap and one quarter rubbing alcohol. Apply the mixture to the stain and allow to soak for 10 minutes, just long enough for it not to dry. The alcohol in the solution should turn the stain a dark colour, but not to worry, it will rinse right out! Rinse the treated area with hot water, and then launder like normal.

BBQ Sauce 

Would a barbecue even be a barbecue if it wasn’t messy to eat? Most people attending a barbecue know the risks going in, but that still doesn’t make the BBQ sauce stains any less harrowing. 

Removing the stain is a two-step process. Soak the affected garment just like you would soak a dirty dish in warm water with dishwashing detergent, this will help loosen the sauce from the fabric and help clean the stain. Once you have left to soak for at least ten minutes, pour some vinegar on the affected area and scrub with a kitchen sponge. After you’ve treated the stain, run the garment through the washing machine like normal. 

Mayonnaise

Mayonnaise is probably the least threatening colour of all sauces listed in this guide, but do not let its neutral colour fool you. Mayonnaise can leave oily spots on your clothing that are not always easy to remove.

When you spill a blob of mayonnaise on your clothing, use a blunt object like a butter knife or spoon to lift as much of the Mayonnaise off the fabric as you can. Never rub because this will push the stain deeper into the fabric, making it harder to remove. Seeing as the bulk of the issue is an oil-based stain, every Mayonnaise stain should be pre-treated using solvent-based stain removal products. If you don’t have any solvent-based stain remover at hand, apply a bit of heavy-duty liquid detergent instead. Then work it in by delicately rubbing with your fingers or a soft-bristled brush. Lastly, wash the garment in the washing machine on the highest heat it recommends on the label

Chilli Sauce

Need some spice in your life, but don’t like it trickling onto your clothes? A good old fashioned spicy hot sauce is great for adding flavour to your dishes, but not so great for your new white work shirt. Most hot sauce ingredients consist of peppers, spices and vinegar. Assuming your favourite brand of chilli sauce doesn’t add too much artificial food colouring, the stains should be simple to remove. 

Acting immediately is proving to be a common theme in this guide. You guessed it, don’t wait until you’ve finished your food to act on a chilli sauce stain, get on the job straight away! 

First things first, run the stain under the tap for at least a minute. Do not rub the stain here, instead let the water flow do the work. We also recommend turning the item inside out and cleaning from the backside to remove it from within the fabric. After this, place the clothing in a sink filled with cold water, add a tablespoon of liquid detergent and vinegar, then gently scrub the stained area. Lastly, put the item in a washing machine and make sure to use warm water, never hot, as this will set the stain. 

If you don’t have the time or patience to clean a worrying stain out of your clothing, why not let the professionals help you? Laundryheap is here to help by offering same-day laundry & dry cleaning collection with free next day delivery.


Leave a comment

How To Clean A Yoga Mat

It’s essential to clean your yoga mat often to remove the dirt, sweat and smell that comes with every use. It will also help prevent your mat from deteriorating and expand the life of your yoga mat. 

How To Clean A Yoga Mat

Consider washing your yoga mat every few months if you don’t use it frequently and at least once a month if you use it regularly. Note that you shouldn’t put your yoga mat into the washing machine or tumble dryer as it can degrade the quality.

  • Soak your yoga mat in the bathtub, filled with warm water and a few tablespoons of mild detergent/ dish soap.
  • Wash both sides of the mat using a soft cloth, focusing more on the dirtier areas.
  • Rinse mat with clean water removing all soap and residue.
  • After rinsing, gently shake the mat to remove excess water.
  • Lay the mat down on top of a clean towel and roll the two together to soak up moisture.
  • Hang your mat up to dry on a drying rack or with pant hangers (be warned it may leave clip marks).

Maintaining Your Yoga Mat

  • Clean your hands and feet before using (if possible). 
  • Wipe matt with a baby wipe or cloth with mild soap after every use.
  • Air out your mat regularly to evaporate lingering smells and moisture.
  • Keep your yoga mat in a cool, dry place and out of sunlight.


6 Comments

How To Clean A Mattress

Many of us often neglect cleaning our mattresses because since we regularly wash our bed linen and don’t come into direct contact with the mattress, we think it’s clean. However, much of our sweat and dead skin cells end up nesting on our mattresses as well as thousands of dust mites.

How To Clean A Mattress

  • Vacuum the mattress
  • Remove stains
  • Sprinkle baking soda
  • Air out the mattress

The first thing you want to do before you start to clean the mattress is to remove all bedding and get them washed! You don’t want to put used sheets back on your bed after cleaning your mattress. 

Vacuum The Mattress

Remove all the unwanted dirt, dust mites and debris from your mattress with a vacuum. Use the upholstery attachment on your vacuum, making sure it is clean before you use it. Also, don’t forget to vacuum both sides and around the edges/corners before you start the stain removal process.

Remove Stains

When going to treat a stain on the mattress, be careful not to add too much of the solution on to the stain, but instead add bits at a time. There are several methods you can try when going to remove stains from your mattress.

  • White Vinegar + Water

Create a mixture of 50/50 white vinegar and water and spray it on to the stain. Let it sit for 5-10 minutes, then dab with a clean cloth. 

  • Baking soda + Water

Dab a mixture of 2 cups of water and 1 tablespoon of baking soda to the stain with a sponge and let it sit for about 30 mins before blotting with a cloth. Alternatively, you can use a spray bottle to apply this mixture onto the stain.

  • Washing up liquid + Water

Combine a mixture of water and 1 table spoon of washing up liquid in a bowl and mix. With a sponge, gently wipe and lift the stain and let it sit for 5-10 mins before blotting it with a clean cloth. Alternatively you can spray the mixture on.

  • Washing up liquid + Hydrogen peroxide

Combine 2 tablespoons of hydrogen peroxide and a tablespoon of dish soap in a bowl and mix to create suds. Using a toothbrush, gently scrub the stains with the suds created from the mixture and wipe off with a clean, damp cloth.

Sprinkle Baking Soda

After treating the stains, sprinkle baking soda over the mattress as it will help to remove odour, adsorb remaining fluids and refresh your mattress. Spread the baking soda out evenly with a cloth or brush and let it for 10-30 mins before vacuuming it.

Air Out The Mattress

Let your mattress air out for a good few hours before putting your bed sheets on. Crack open a window and allow fresh air to circulate in the room for your mattress to ‘breath’ and dry out.

To protect your mattress and to minimise cleaning, use a mattress protector. It’s usually made from plastic and will protect your mattress from stains, dirt and bugs. However, this should be cleaned every month to maintain the cleanliness of the mattress.

If you require a professional dry cleaner to clean your home and bedding items, Laundryheap can get the job done for you in within 48 hours.


Leave a comment

3 Ways To Clean Your Cap

There are several methods you can use when it comes to cleaning your cap, all of which do not involve putting it in the washing machine. Knowing the type of fabric and how dirty your cap is will help you choose the best cleaning method for your cap.

NOTE: Before cleaning your caps, make sure you always check the care label first to avoid unwanted mishaps.

Hand Washing

Washing your cap by hand is the most effective and safest way to clean your cap. This method is best suited for baseball caps, wool, and hand-knitted caps.

  1. Fill a sink or bucket with warm water.
  2. Add a few drops of mild detergent to the water- laundry detergent, liquid dish soap or mild shampoo- making sure the water isn’t too soapy.
  3. Grab an old toothbrush or cloth and spot clean the dirtiest areas of the hat first with the soapy water, before moving onto the other areas of the cap.
  4. Let the cap soak in the soapy water for a few minutes up to a few hours.
  5. Rinse the cap off with cold water and gently squeeze to remove excess water.
  6. Let the cap air dry indoors, away from sunlight and tuck a hand towel inside the cap to keep it’s shape. 

Spot Treating

Spot cleaning is another safe cleaning method and is best used for caps made out of delicate fabrics, like leather and suede caps.

  1. Dab the cap gently with a damp washcloth from a mixture of water and mild detergent or dish soap. If your cap has a tough stain on it, try a natural stain remover as these are more gentle for the fabric. 
  2. After spot treating, allow the cap to air dry in a well-ventilated area, away from direct sunlight.

Dry Cleaning

For non-washable caps, dry cleaning is the best way to get them cleaned. You can invest in a home dry cleaning kit or take your cap to a professional dry cleaner.


3 Comments

The Right Way To Care For Your Suit

You splashed out a bit of money for a prestige suit and now you have to ensure it is well maintained or it won’t be worth the money you spent on it.

Follow these easy tips to make your suit last longer:

  • Avoid regular trips to the dry-cleaners

A key cleaning tip is to not have your suit dry cleaned regularly unless absolutely necessary. Instead, use a damp cloth to spot clean any dirty areas rather than the whole suit. A trip to the dry cleaners (or a scheduled pick up from Laundryheap) is suitable only when: a tough stain occurs, there’s visible dirt or built up odour.

suit

  • Use a brush and lint roller

The fabric on suits can accumulate particles of dust, dirt or lint from the environment which, if left over time, will cause damage to the fabric. Invest in a brush and occasionally use with a lint roller to remove the debris. Use in a careful, downward motion.

suit

  • Use the right hanger

Do avoid using wired hangers. Stick to using a wooden or thick plastic hanger that will take the shape of the suit shoulders. This way, it will keep it in a good shape and promote longevity of the suit.

Always remember to hang your suit when you’re not using it!

suit

  • Steam, don’t iron!

Steaming is a great way to remove creases and wrinkles on suits. Unlike ironing, it’s a delicate method that won’t damage the fibres.

Caution: when steaming, avoid the chest area to maintain the shape of the internal canvas.

34049874230_5ed61cca5f_b.jpg

  • Use a garment bag

If you’re on the go and you need to carry your suit with you, use a garment bag to keep it in good shape. It’s easy to carry, light and breathable for your suit. Plus, you don’t have to fold it.

LaundryHeap_006RG (1)


3 Comments

No Stain – No Pain! Unusual Stain Removers

Laundryheap

red-wine-505296_1920

Are you familiar with that sinking feeling in your gut when you accidentally spill some red wine on your favourite pastel coloured cocktail dress? Well, no need to stress next time. Here are some unusual, quick-fix remedies for removing stains without too much hassle.

  1. White Wine – Removes fresh red wine stains 

    Ironic as it seems, white wine acts as a neutralising agent for red wine. It disbands the anthocyanin compounds which are responsible for causing the red stains. Gently blot the excess liquid using a napkin or paper towel, before dabbing some white wine onto the affected area. Blot and repeat till the stain starts fading and follow it up with a regular wash.

  2. Baby Powder – Removes grease and oil stains 

    For grease and oil stains, especially from cooked food, sprinkle some talcum or baby powder onto the fabric taking care to cover the stain completely. The fine granules act as minuscule sponges and soak up the oil particles. Leave it on for approximately 20-30 minutes depending on the size of the stain. Use a toothbrush to gently brush off the powder. Take off as much as you can before soaking the cloth in warm water for a few minutes and running it through the usual laundry cycle thereafter.

  3. Milk – Removes ink stains 

    Got a leaky pen in your pocket? If you have some whole milk you have nothing to worry about! Simply soak the garment overnight in a bowl of milk, making sure that the stained portion is completely submerged. If there are slight traces of ink in the morning, gently rub the fabric to work out the stain. Then run it through the usual wash cycle. For better results, add some white vinegar to the milk. Milk is an emulsion which attracts both oil and water. Some inks with an oil-soluble base are therefore dissolved by the milk.

  4. Stale Bread – Removes dirt stains on suede 

    Use a slice of stale bread to lift surface grime and dirt off suede. Roll the slice into a ball and rub it over the affected area. Repeat the process till all the dirt is pulled out. Brush off the remaining crumbs with a toothbrush or makeup brush.

  5. Egg Yolk – Removes coffee stains 

    Yes, you read that right! Stubborn coffee stains can be completely removed by beating an egg and rubbing it into the stain with a sponge for a couple of minutes. Rinse the fabric with cold water and you have a stain-free garment in no time.

  6. Laundryheap Removes a wide variety of stains

Stains removed at the tap of a button!  Book here to schedule collection.